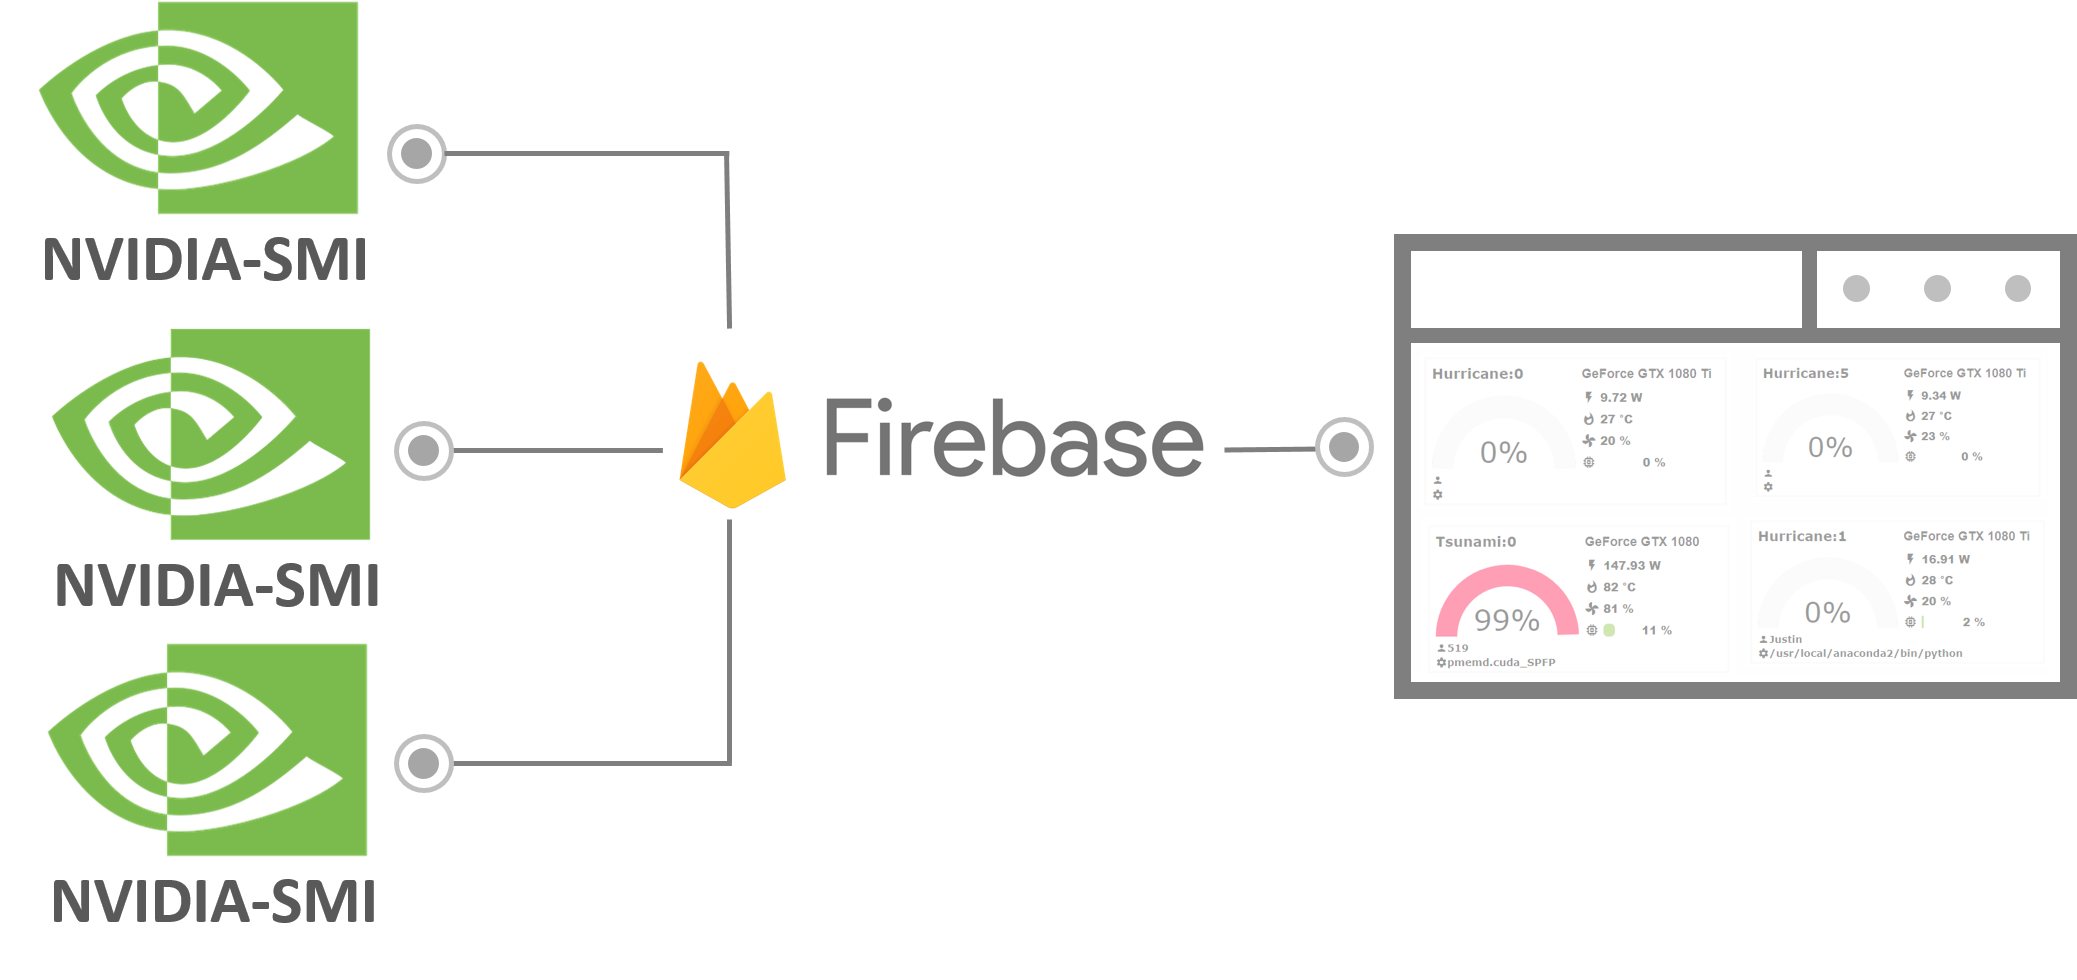
%global _empty_manifest_terminate_build 0
Name: python-GPUDashboard
Version: 0.2.8
Release: 1
Summary: A NVIDIA GPU dashboard
License: MIT License
URL: https://github.com/Yuan-Yu/GPUDashboard
Source0: https://mirrors.aliyun.com/pypi/web/packages/ce/b5/8492a7ca64d30e0378619e6cdd8f55dbc90f9b3e209c1c7b8b72a91cdf11/GPUDashboard-0.2.8.tar.gz
BuildArch: noarch
%description
# GPUDashboard
A simple dashboard for NVIDIA GPU

## Demo
[Example](https://yuan-yu.github.io/GPUDashboard/)
## Requirement
- Python 2.7 or 3.6
- NVIDIA-sim
- A Firebase realtime database
- Linux-like OS
## Setup
1. Create a [Firebase **Realtime** database](https://console.firebase.google.com/)
2. Set the rules to
```json
{
"rules": {
".read": true,
".write": true
}
}
```
3. Go to Project overview click **Add Firebase to your web app** and copy following part.
```javascript
var config = {
apiKey: "XXXXXXXXXXXXXXXXXXXXXXXXXXXX",
authDomain: "XXXXX.firebaseapp.com",
databaseURL: "https://XXXXXX.firebaseio.com",
projectId: "XXXXXXX",
storageBucket: "XXXXXXX.appspot.com",
messagingSenderId: "XXXXXXXXXXX"
};
```
4. **On the servers** that have NVIDIA GPU(s) installed.
```bash
pip install GPUDashboard
GPUDashboard -n your_server_name -i 20 -u your_databaseURL > GPUDashboard.log
# your_server_name is the name you want to give your server e.g. MyFirstServer
# -i is the interval of GPU information updating
# your_databaseURL is the databaseURL obtained froom Firebase as shown above
```
Now, the server GPU information is post to the firebase. ***If you have many servers, all of them can make use of the same database you created in Firebase. You only need to specify different names for "your_server_name" when you start the GPUDashboard in the command line on the different servers.**
5. Download [ViewStatus.html](https://raw.githubusercontent.com/Yuan-Yu/GPUDashboard/master/ViewStatus.html) and open with text editor then replace the "config".
```html
```
6. Open the "**modified** ViewStatus.html" with browser.
%package -n python3-GPUDashboard
Summary: A NVIDIA GPU dashboard
Provides: python-GPUDashboard
BuildRequires: python3-devel
BuildRequires: python3-setuptools
BuildRequires: python3-pip
%description -n python3-GPUDashboard
# GPUDashboard
A simple dashboard for NVIDIA GPU

## Demo
[Example](https://yuan-yu.github.io/GPUDashboard/)
## Requirement
- Python 2.7 or 3.6
- NVIDIA-sim
- A Firebase realtime database
- Linux-like OS
## Setup
1. Create a [Firebase **Realtime** database](https://console.firebase.google.com/)
2. Set the rules to
```json
{
"rules": {
".read": true,
".write": true
}
}
```
3. Go to Project overview click **Add Firebase to your web app** and copy following part.
```javascript
var config = {
apiKey: "XXXXXXXXXXXXXXXXXXXXXXXXXXXX",
authDomain: "XXXXX.firebaseapp.com",
databaseURL: "https://XXXXXX.firebaseio.com",
projectId: "XXXXXXX",
storageBucket: "XXXXXXX.appspot.com",
messagingSenderId: "XXXXXXXXXXX"
};
```
4. **On the servers** that have NVIDIA GPU(s) installed.
```bash
pip install GPUDashboard
GPUDashboard -n your_server_name -i 20 -u your_databaseURL > GPUDashboard.log
# your_server_name is the name you want to give your server e.g. MyFirstServer
# -i is the interval of GPU information updating
# your_databaseURL is the databaseURL obtained froom Firebase as shown above
```
Now, the server GPU information is post to the firebase. ***If you have many servers, all of them can make use of the same database you created in Firebase. You only need to specify different names for "your_server_name" when you start the GPUDashboard in the command line on the different servers.**
5. Download [ViewStatus.html](https://raw.githubusercontent.com/Yuan-Yu/GPUDashboard/master/ViewStatus.html) and open with text editor then replace the "config".
```html
```
6. Open the "**modified** ViewStatus.html" with browser.
%package help
Summary: Development documents and examples for GPUDashboard
Provides: python3-GPUDashboard-doc
%description help
# GPUDashboard
A simple dashboard for NVIDIA GPU

## Demo
[Example](https://yuan-yu.github.io/GPUDashboard/)
## Requirement
- Python 2.7 or 3.6
- NVIDIA-sim
- A Firebase realtime database
- Linux-like OS
## Setup
1. Create a [Firebase **Realtime** database](https://console.firebase.google.com/)
2. Set the rules to
```json
{
"rules": {
".read": true,
".write": true
}
}
```
3. Go to Project overview click **Add Firebase to your web app** and copy following part.
```javascript
var config = {
apiKey: "XXXXXXXXXXXXXXXXXXXXXXXXXXXX",
authDomain: "XXXXX.firebaseapp.com",
databaseURL: "https://XXXXXX.firebaseio.com",
projectId: "XXXXXXX",
storageBucket: "XXXXXXX.appspot.com",
messagingSenderId: "XXXXXXXXXXX"
};
```
4. **On the servers** that have NVIDIA GPU(s) installed.
```bash
pip install GPUDashboard
GPUDashboard -n your_server_name -i 20 -u your_databaseURL > GPUDashboard.log
# your_server_name is the name you want to give your server e.g. MyFirstServer
# -i is the interval of GPU information updating
# your_databaseURL is the databaseURL obtained froom Firebase as shown above
```
Now, the server GPU information is post to the firebase. ***If you have many servers, all of them can make use of the same database you created in Firebase. You only need to specify different names for "your_server_name" when you start the GPUDashboard in the command line on the different servers.**
5. Download [ViewStatus.html](https://raw.githubusercontent.com/Yuan-Yu/GPUDashboard/master/ViewStatus.html) and open with text editor then replace the "config".
```html
```
6. Open the "**modified** ViewStatus.html" with browser.
%prep
%autosetup -n GPUDashboard-0.2.8
%build
%py3_build
%install
%py3_install
install -d -m755 %{buildroot}/%{_pkgdocdir}
if [ -d doc ]; then cp -arf doc %{buildroot}/%{_pkgdocdir}; fi
if [ -d docs ]; then cp -arf docs %{buildroot}/%{_pkgdocdir}; fi
if [ -d example ]; then cp -arf example %{buildroot}/%{_pkgdocdir}; fi
if [ -d examples ]; then cp -arf examples %{buildroot}/%{_pkgdocdir}; fi
pushd %{buildroot}
if [ -d usr/lib ]; then
find usr/lib -type f -printf "\"/%h/%f\"\n" >> filelist.lst
fi
if [ -d usr/lib64 ]; then
find usr/lib64 -type f -printf "\"/%h/%f\"\n" >> filelist.lst
fi
if [ -d usr/bin ]; then
find usr/bin -type f -printf "\"/%h/%f\"\n" >> filelist.lst
fi
if [ -d usr/sbin ]; then
find usr/sbin -type f -printf "\"/%h/%f\"\n" >> filelist.lst
fi
touch doclist.lst
if [ -d usr/share/man ]; then
find usr/share/man -type f -printf "\"/%h/%f.gz\"\n" >> doclist.lst
fi
popd
mv %{buildroot}/filelist.lst .
mv %{buildroot}/doclist.lst .
%files -n python3-GPUDashboard -f filelist.lst
%dir %{python3_sitelib}/*
%files help -f doclist.lst
%{_docdir}/*
%changelog
* Tue Jun 20 2023 Python_Bot - 0.2.8-1
- Package Spec generated