
diff options
| author | CoprDistGit <infra@openeuler.org> | 2023-05-10 07:37:50 +0000 |
|---|---|---|
| committer | CoprDistGit <infra@openeuler.org> | 2023-05-10 07:37:50 +0000 |
| commit | a5ae69bcdc34b35e2d20157a9c714c083d8b5286 (patch) | |
| tree | b4a0423db55c675a4637993e972c1f5a58ce4efd | |
| parent | aa4ff680eb9e7c3c5eb8404d2355aae48051ba80 (diff) | |
automatic import of python-cv2-tools
| -rw-r--r-- | .gitignore | 1 | ||||
| -rw-r--r-- | python-cv2-tools.spec | 477 | ||||
| -rw-r--r-- | sources | 1 |
3 files changed, 479 insertions, 0 deletions
@@ -0,0 +1 @@ +/cv2_tools-2.4.0.tar.gz diff --git a/python-cv2-tools.spec b/python-cv2-tools.spec new file mode 100644 index 0000000..7938593 --- /dev/null +++ b/python-cv2-tools.spec @@ -0,0 +1,477 @@ +%global _empty_manifest_terminate_build 0 +Name: python-cv2-tools +Version: 2.4.0 +Release: 1 +Summary: Library to help the drawing process with OpenCV. Thought to add labels to the images. Classification of images, etc. +License: MIT +URL: https://github.com/fernaper/opencv-draw-tools +Source0: https://mirrors.nju.edu.cn/pypi/web/packages/04/50/63a2af8b9ed93d811cbfa884191a38597deb0472b3b60f476dc1cc55f2bf/cv2_tools-2.4.0.tar.gz +BuildArch: noarch + +Requires: python3-numpy +Requires: python3-constraint +Requires: python3-imagehash + +%description +# cv2_tools +Library to help the drawing process with OpenCV. Thought to add labels to the images. Classification of images, etc. + +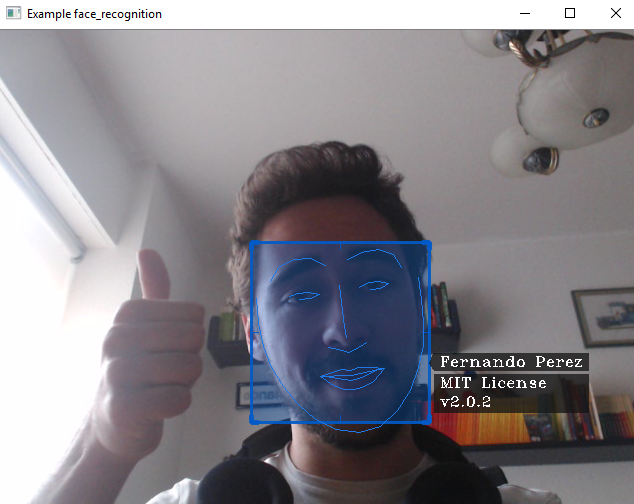 + +**Image generated with face_recognition and drawed with cv2-tools version 2.0.2** + +## Installation + +### Pre-requisites + +You will need to install: + +* opencv >= 3.6.2 +* numpy >= 1.13.3 +* python-constraint >= 1.4.0 + +You can simply execute: +`pip install -r requirements.txt` + +Finally you can install the library with: + +`pip install cv2-tools` + +When you install `cv2-tools`, it will automatically download `numpy` but not opencv becouse in some cases you will need another version. + +## Test + +``` +import cv2_tools + +print('Name: {}\nVersion:{}\nHelp:{}'.format(cv2_tools.name,cv2_tools.__version__,cv2_tools.help)) +webcam_test() +``` + +## Ussage and Important classes + +### ManagerCV2 + +``` +from cv2_tools.Management import ManagerCV2 +``` + +If you want to work with video or stream, this class will help you mantain your code cleaner while you get more features. + +For example: + - Open a a stream (your webcam). + - Reproduce it on real time with max FPS equals to 24. + - Press `esc` to finish the program. + - At the end print average FPS. + +``` +from cv2_tools.Managment import ManagerCV2 +import cv2 + +# keystroke=27 is the button `esc` +manager_cv2 = ManagerCV2(cv2.VideoCapture(0), is_stream=True, keystroke=27, wait_key=1, fps_limit=60) + + # This for will manage file descriptor for you + for frame in manager_cv2: + cv2.imshow('Example easy manager', frame) + cv2.destroyAllWindows() + print(manager_cv2.get_fps()) +``` + +If you want to use another button and you don't know the ID, you can check easily using the following code: + +``` +from cv2_tools.Managment import ManagerCV2 +import cv2 + +# keystroke=27 is the button `esc` +manager_cv2 = ManagerCV2(cv2.VideoCapture(0), is_stream=True, keystroke=27, wait_key=1, fps_limit=60) + + # This for will manage file descriptor for you + for frame in manager_cv2: + # Each time you press a button, you will get its id in your terminal + last_keystroke = manager_cv2.get_last_keystroke() + if last_keystroke != -1: + print(last_keystroke) + cv2.imshow('Easy button checker', frame) + cv2.destroyAllWindows() +``` + +### SelectorCV2 + +Firstly create a SelectorCV2 object. You can pass it optional parameters to configure the output. +``` +from cv2_tools.Selection import SelectorCV2 +selector = SelectorCV2(color=(200,90,0), filled=True) +``` + +Also you can configure it later using the method (all optional parameters): +``` +selector.set_properties() +``` + +Now, each time you want to add a selected zone call the method: +``` +""" +Coordinates: + +(x1,y1)____(x2,y1) + | | + | | +(x1,y2)____(x2,y2) + +Tags (optional parameter): +* It could be a normal string +* A string with '\n' +* A list of strings +* None / '' / [] / False +""" +selector.add_zone((x1,y1,x2,y2),tags=tag) +``` + +Finally, when you want to draw all the rectangles execute: +``` +edited_frame = selector.draw(frame) +``` + +If you want to use the same object multiple times you can easily change the content inside it: +``` +# This method could help change rectangles to +selector.set_range_valid_rectangles( origin, destination) + +# This method could help if you know exactly the indexes that you want to keep +# Default = [], so if you just want to clean the buffer call this method without parameters +set_valid_rectangles(indexes) +``` + +If you want, you can see the example [detect_faces.py](examples/detect_faces.py), it also use an open source library called `face_recognition`. + + + + +%package -n python3-cv2-tools +Summary: Library to help the drawing process with OpenCV. Thought to add labels to the images. Classification of images, etc. +Provides: python-cv2-tools +BuildRequires: python3-devel +BuildRequires: python3-setuptools +BuildRequires: python3-pip +%description -n python3-cv2-tools +# cv2_tools +Library to help the drawing process with OpenCV. Thought to add labels to the images. Classification of images, etc. + + + +**Image generated with face_recognition and drawed with cv2-tools version 2.0.2** + +## Installation + +### Pre-requisites + +You will need to install: + +* opencv >= 3.6.2 +* numpy >= 1.13.3 +* python-constraint >= 1.4.0 + +You can simply execute: +`pip install -r requirements.txt` + +Finally you can install the library with: + +`pip install cv2-tools` + +When you install `cv2-tools`, it will automatically download `numpy` but not opencv becouse in some cases you will need another version. + +## Test + +``` +import cv2_tools + +print('Name: {}\nVersion:{}\nHelp:{}'.format(cv2_tools.name,cv2_tools.__version__,cv2_tools.help)) +webcam_test() +``` + +## Ussage and Important classes + +### ManagerCV2 + +``` +from cv2_tools.Management import ManagerCV2 +``` + +If you want to work with video or stream, this class will help you mantain your code cleaner while you get more features. + +For example: + - Open a a stream (your webcam). + - Reproduce it on real time with max FPS equals to 24. + - Press `esc` to finish the program. + - At the end print average FPS. + +``` +from cv2_tools.Managment import ManagerCV2 +import cv2 + +# keystroke=27 is the button `esc` +manager_cv2 = ManagerCV2(cv2.VideoCapture(0), is_stream=True, keystroke=27, wait_key=1, fps_limit=60) + + # This for will manage file descriptor for you + for frame in manager_cv2: + cv2.imshow('Example easy manager', frame) + cv2.destroyAllWindows() + print(manager_cv2.get_fps()) +``` + +If you want to use another button and you don't know the ID, you can check easily using the following code: + +``` +from cv2_tools.Managment import ManagerCV2 +import cv2 + +# keystroke=27 is the button `esc` +manager_cv2 = ManagerCV2(cv2.VideoCapture(0), is_stream=True, keystroke=27, wait_key=1, fps_limit=60) + + # This for will manage file descriptor for you + for frame in manager_cv2: + # Each time you press a button, you will get its id in your terminal + last_keystroke = manager_cv2.get_last_keystroke() + if last_keystroke != -1: + print(last_keystroke) + cv2.imshow('Easy button checker', frame) + cv2.destroyAllWindows() +``` + +### SelectorCV2 + +Firstly create a SelectorCV2 object. You can pass it optional parameters to configure the output. +``` +from cv2_tools.Selection import SelectorCV2 +selector = SelectorCV2(color=(200,90,0), filled=True) +``` + +Also you can configure it later using the method (all optional parameters): +``` +selector.set_properties() +``` + +Now, each time you want to add a selected zone call the method: +``` +""" +Coordinates: + +(x1,y1)____(x2,y1) + | | + | | +(x1,y2)____(x2,y2) + +Tags (optional parameter): +* It could be a normal string +* A string with '\n' +* A list of strings +* None / '' / [] / False +""" +selector.add_zone((x1,y1,x2,y2),tags=tag) +``` + +Finally, when you want to draw all the rectangles execute: +``` +edited_frame = selector.draw(frame) +``` + +If you want to use the same object multiple times you can easily change the content inside it: +``` +# This method could help change rectangles to +selector.set_range_valid_rectangles( origin, destination) + +# This method could help if you know exactly the indexes that you want to keep +# Default = [], so if you just want to clean the buffer call this method without parameters +set_valid_rectangles(indexes) +``` + +If you want, you can see the example [detect_faces.py](examples/detect_faces.py), it also use an open source library called `face_recognition`. + + + + +%package help +Summary: Development documents and examples for cv2-tools +Provides: python3-cv2-tools-doc +%description help +# cv2_tools +Library to help the drawing process with OpenCV. Thought to add labels to the images. Classification of images, etc. + + + +**Image generated with face_recognition and drawed with cv2-tools version 2.0.2** + +## Installation + +### Pre-requisites + +You will need to install: + +* opencv >= 3.6.2 +* numpy >= 1.13.3 +* python-constraint >= 1.4.0 + +You can simply execute: +`pip install -r requirements.txt` + +Finally you can install the library with: + +`pip install cv2-tools` + +When you install `cv2-tools`, it will automatically download `numpy` but not opencv becouse in some cases you will need another version. + +## Test + +``` +import cv2_tools + +print('Name: {}\nVersion:{}\nHelp:{}'.format(cv2_tools.name,cv2_tools.__version__,cv2_tools.help)) +webcam_test() +``` + +## Ussage and Important classes + +### ManagerCV2 + +``` +from cv2_tools.Management import ManagerCV2 +``` + +If you want to work with video or stream, this class will help you mantain your code cleaner while you get more features. + +For example: + - Open a a stream (your webcam). + - Reproduce it on real time with max FPS equals to 24. + - Press `esc` to finish the program. + - At the end print average FPS. + +``` +from cv2_tools.Managment import ManagerCV2 +import cv2 + +# keystroke=27 is the button `esc` +manager_cv2 = ManagerCV2(cv2.VideoCapture(0), is_stream=True, keystroke=27, wait_key=1, fps_limit=60) + + # This for will manage file descriptor for you + for frame in manager_cv2: + cv2.imshow('Example easy manager', frame) + cv2.destroyAllWindows() + print(manager_cv2.get_fps()) +``` + +If you want to use another button and you don't know the ID, you can check easily using the following code: + +``` +from cv2_tools.Managment import ManagerCV2 +import cv2 + +# keystroke=27 is the button `esc` +manager_cv2 = ManagerCV2(cv2.VideoCapture(0), is_stream=True, keystroke=27, wait_key=1, fps_limit=60) + + # This for will manage file descriptor for you + for frame in manager_cv2: + # Each time you press a button, you will get its id in your terminal + last_keystroke = manager_cv2.get_last_keystroke() + if last_keystroke != -1: + print(last_keystroke) + cv2.imshow('Easy button checker', frame) + cv2.destroyAllWindows() +``` + +### SelectorCV2 + +Firstly create a SelectorCV2 object. You can pass it optional parameters to configure the output. +``` +from cv2_tools.Selection import SelectorCV2 +selector = SelectorCV2(color=(200,90,0), filled=True) +``` + +Also you can configure it later using the method (all optional parameters): +``` +selector.set_properties() +``` + +Now, each time you want to add a selected zone call the method: +``` +""" +Coordinates: + +(x1,y1)____(x2,y1) + | | + | | +(x1,y2)____(x2,y2) + +Tags (optional parameter): +* It could be a normal string +* A string with '\n' +* A list of strings +* None / '' / [] / False +""" +selector.add_zone((x1,y1,x2,y2),tags=tag) +``` + +Finally, when you want to draw all the rectangles execute: +``` +edited_frame = selector.draw(frame) +``` + +If you want to use the same object multiple times you can easily change the content inside it: +``` +# This method could help change rectangles to +selector.set_range_valid_rectangles( origin, destination) + +# This method could help if you know exactly the indexes that you want to keep +# Default = [], so if you just want to clean the buffer call this method without parameters +set_valid_rectangles(indexes) +``` + +If you want, you can see the example [detect_faces.py](examples/detect_faces.py), it also use an open source library called `face_recognition`. + + + + +%prep +%autosetup -n cv2-tools-2.4.0 + +%build +%py3_build + +%install +%py3_install +install -d -m755 %{buildroot}/%{_pkgdocdir} +if [ -d doc ]; then cp -arf doc %{buildroot}/%{_pkgdocdir}; fi +if [ -d docs ]; then cp -arf docs %{buildroot}/%{_pkgdocdir}; fi +if [ -d example ]; then cp -arf example %{buildroot}/%{_pkgdocdir}; fi +if [ -d examples ]; then cp -arf examples %{buildroot}/%{_pkgdocdir}; fi +pushd %{buildroot} +if [ -d usr/lib ]; then + find usr/lib -type f -printf "/%h/%f\n" >> filelist.lst +fi +if [ -d usr/lib64 ]; then + find usr/lib64 -type f -printf "/%h/%f\n" >> filelist.lst +fi +if [ -d usr/bin ]; then + find usr/bin -type f -printf "/%h/%f\n" >> filelist.lst +fi +if [ -d usr/sbin ]; then + find usr/sbin -type f -printf "/%h/%f\n" >> filelist.lst +fi +touch doclist.lst +if [ -d usr/share/man ]; then + find usr/share/man -type f -printf "/%h/%f.gz\n" >> doclist.lst +fi +popd +mv %{buildroot}/filelist.lst . +mv %{buildroot}/doclist.lst . + +%files -n python3-cv2-tools -f filelist.lst +%dir %{python3_sitelib}/* + +%files help -f doclist.lst +%{_docdir}/* + +%changelog +* Wed May 10 2023 Python_Bot <Python_Bot@openeuler.org> - 2.4.0-1 +- Package Spec generated @@ -0,0 +1 @@ +57660932d7d0ce8e500a11c3e78a7975 cv2_tools-2.4.0.tar.gz |