
diff options
| author | CoprDistGit <infra@openeuler.org> | 2023-05-31 08:01:12 +0000 |
|---|---|---|
| committer | CoprDistGit <infra@openeuler.org> | 2023-05-31 08:01:12 +0000 |
| commit | d7878c714427c5b4d5d8a62454d63a1c05591cdc (patch) | |
| tree | 6f6b5ee4276f295878ebef754dd8ebda2dc0facb | |
| parent | a0f85d9a725fb11766cda203653a7b598a459ac3 (diff) | |
automatic import of python-xiaobaiauto2
| -rw-r--r-- | .gitignore | 1 | ||||
| -rw-r--r-- | python-xiaobaiauto2.spec | 1090 | ||||
| -rw-r--r-- | sources | 1 |
3 files changed, 1092 insertions, 0 deletions
@@ -0,0 +1 @@ +/xiaobaiauto2-0.5.1.tar.gz diff --git a/python-xiaobaiauto2.spec b/python-xiaobaiauto2.spec new file mode 100644 index 0000000..3764b56 --- /dev/null +++ b/python-xiaobaiauto2.spec @@ -0,0 +1,1090 @@ +%global _empty_manifest_terminate_build 0 +Name: python-xiaobaiauto2 +Version: 0.5.1 +Release: 1 +Summary: xiaobaiauto2是对自动化框架的第三次更新,功能覆盖UI自动化与API自动化意在帮助对自动化有更多需求且过多时间写代码的人群,让大家的时间花在业务的实现上 +License: Apache Software License +URL: https://gitee.com/xiaobaikeji/xiaobaiauto2 +Source0: https://mirrors.nju.edu.cn/pypi/web/packages/d5/13/050eabcbd363f88c03e651497a21fb60f2a9e1c8a08539cd0f70d83e9585/xiaobaiauto2-0.5.1.tar.gz +BuildArch: noarch + +Requires: python3-allure-pytest +Requires: python3-Appium-Python-Client +Requires: python3-jmespath +Requires: python3-mitmproxy +Requires: python3-pytest +Requires: python3-pytest-cov +Requires: python3-pytest-sugar +Requires: python3-pytest-html +Requires: python3-pytest-ordering +Requires: python3-pytest-rerunfailures +Requires: python3-pytest-xdist +Requires: python3-pytest-instafail +Requires: python3-pyyaml +Requires: python3-requests +Requires: python3-selenium +Requires: python3-pyperclip + +%description +[](https://pepy.tech/project/xiaobaiauto2) +[](https://pepy.tech/project/xiaobaiauto2/month) +[](https://pepy.tech/project/xiaobaiauto2/week) +[](https://img.shields.io/badge/xiaobaiauto2-success-green) + +# 简介 + xiaobaiauto2是一套自动化框架,功能覆盖UI自动化与API自动化 + 意在帮助对自动化有更多需求且过多时间写代码的人群,让大家的时间 + 花在业务的实现上 +## 架构 + +## 开始使用 +#### 了解测试用例目录 + test + | + |--__init__.py + | + |--WebTest + | | + | |--conftest.py + | |--test_WebUI.py + | + |--APPTest + | | + | |--conftest.py + | |--test_Xiaobai_APP_Case1.py + | |--test_Xiaobai_APP_Case2.py + | + |--APITest + | | + | |--test_cases.py + | |--yewua.py + +#### 了解关键词 +| 序号 | CMD | key | +| :--- | :--- |:------------| +| 1 | 打开网页 | OPENURL | +|2 | 点击 | CLICK | +|3 | 输入 | SENDKEY | +|4 | 刷新 | REFRESH | +|5 | 后退 | BACK | +|6 | 关闭 | CLOSE | +|7 | 退出 | QUIT | +|8 | 标签 | TAG | +|9 | 属性 | ATTR | +|10 | URL | CURL | +|11 | 标题 | ITLE | +|12 | 内嵌页 | FRAME | +|13 | 标签页[序号(1开始)] | WINDOW | +|14 | JS_确定 | ALERT0 | +|15 | JS_取消 | ALERT1 | +|16 | JS_输入框 | ALERT2 | +|17 | JS_文本 | ALERT3 | +|18 | 停止 | WAIT | +|19 | 脚本 | SCRIPT | +|20 | 添加cookie | ADDCOOKIE | +|21 | 滑屏 | SWIPE | +|22 | 截屏 | DSCREENSHOT | +|23 | 元素截图 | ESCREENSHOT | +|24 | 识别验证码 | FINDTEXT | +|25 | 坐标 | LOCATION | +|26 | 网页源码 | PAGESOURCE | + +#### 修改脚本 +参考test目录下面的脚本 + + @pytest.mark.xiaobai_web + def test_Case1(browser): + web_action(browser, cmd=cmd.打开网页, loc='', data='http://www.baidu.com') + web_action(browser, cmd=cmd.输入, loc='//*[@id="kw"]', data='小白科技') + web_action(browser, cmd=cmd.点击, loc='//*[@id="su"]') + web_action(browser, cmd=cmd.wait, data=3) + web_action(browser, cmd=cmd.标题, contains_assert='小白') + +关键词的使用,看上面示例亦可(xiaobaiauto2>0.1.5.0) + + - 1 导入cmd类 + + from xiaobaiauto2.xiaobaiauto2 import cmd + + - 2 cmd类调用属性 + + cmd.关键词 + +若感觉关键词不足以使用,可以直接使用原生方法,示例如下 + + browser.find_element(by=By.ID, value='id属性值').click() + +代码执行之前,若您需要发送邮件,请将`test_first`方法中的`email`的参数值进行自行修改即可 + +##### 备注 +- 若APP测试需要获取toast信息可以写一个方法添加到自己的项目中,代码样例如下: + ``` + def find_toast(self, message, timeout, poll_frequency): + new_message = f"//*[@text=\'{message}\']" + element = WebDriverWait(self.driver, timeout, poll_frequency).until( + EC.presence_of_element_located((By.XPATH, new_message))) + return element.text + ``` + +### 使用 +#### 1、命令行运行脚本 + pytest --html=report.html --self-contained-html + or + pytest --html=report.html --self-contained-html -m xiaobai_web + or + pytest --html=report.html --self-contained-html -o log_cli=true -o log_cli_level=INFO + +#### 2、定时任务界面运行脚本(CMD命令) + xiaobaiauto2Timer + 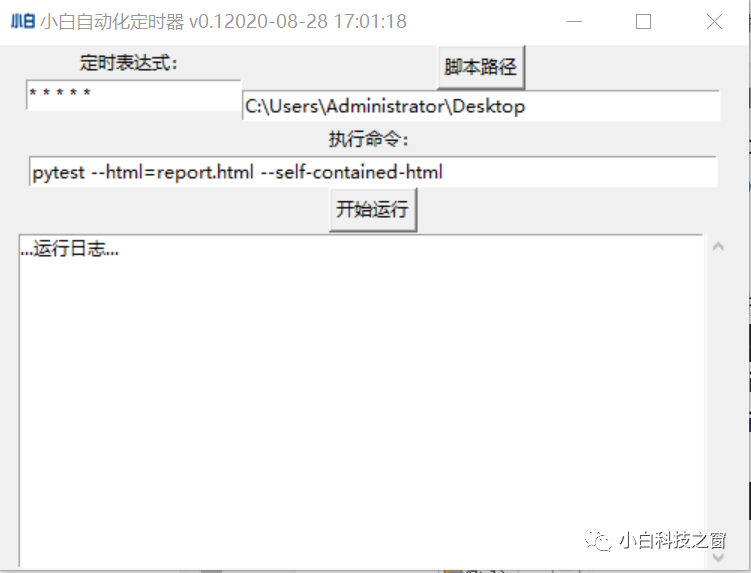 + +#### 3.1、xiaobaiauto2Api将raw数据转换成python代码(版本>0.1.3.1可用) + xiaobaiauto2Api -h # 帮助文档提示 + xiaobaiauto2Api -f *.txt -s *.py + xiaobaiauto2Api -f *.txt -x 2 + xiaobaiauto2Api -f *.saz -x 2 + xiaobaiauto2Api -f *.har -x 2 + xiaobaiauto2Api -f *.har -x 3 + xiaobaiauto2Api -d D:\example + +#### 3.2、xiaobaiauto2 >= 0.1.4.5 支持c参数 + xiaobaiauto2Api -c 1 -f 1.har,2.har + xiaobaiauto2Api -c 1 -f 1.har,2.har -d E:\example + xiaobaiauto2Api -c 1 -f 1.har,2.har -d E:\example -s 1_2_compare + xiaobaiauto2Api -c 1 -f 1.har.2.har -d E:\example -x 3 # 生成*.jmx(含提取器、参数化)[>=0.1.7.2] +#### 3.3、xiaobaiauto2 >= 0.1.5.5 支持t参数 + xiaobaiauto2Api -t api // 生成api测试模板 + xiaobaiauto2Api -t web // 生成web测试模板 + xiaobaiauto2Api -t app // 生成app测试模板 + +#### 3.4、xiaobaiauto2 >= 0.1.6.3 支持i与v参数(请看3.6) 不指定版本默认安装最新版哦 + xiaobaiauto2Api -i jdk -v 8 // 安装jdk8 + xiaobaiauto2Api -i jmeter -v 5.3 // 安装jmeter5.3 + xiaobaiauto2Api -i chromedriver -v 88 // 安装chromedriver的88版本 + xiaobaiauto2Api -i allure -d "D:\Program Files" // 安装allure(会有些慢哦) + +#### 3.5、xiaobaiauto2 >= 0.1.6.5 支持mock模拟接口 + from xiaobaiauto2.xiaobaiauto2 import mock, MockServer + + @mock(uri='/login', response={"errcode": 200, "msg": "登录成功", "data": {"token": "123456"}}) + @mock(uri='/register', response={"errcode": 200, "msg": "注册成功", "data": {}}) + @MockServer(uri='/index', response={"errcode": 200, "msg": "首页成功", "data": {}}) + def run(): pass + + if __name__ == '__main__': + run(port=7777) +- 导入mock方法 + ``` + from xiaobaiauto2.xiaobaiauto2 import mock, MockServer + ``` + +- 定义mock接口,mock与MockServer无区别,uri为接口路径,response为接口返回值,run为被装饰的函数名称可自定义 + ``` + @mock(uri='/login', response={"errcode": 200, "msg": "登录成功", "data": {"token": "123456"}}) + @mock(uri='/register', response={"errcode": 200, "msg": "注册成功", "data": {}}) + @MockServer(uri='/index', response={"errcode": 200, "msg": "首页成功", "data": {}}) + def run(): pass + ``` +- 启动mock接口服务, run为上面被装饰的方法名,port为监听的端口(默认6666) + ``` + if __name__ == '__main__': + run(port=7777) + ``` +- jmeter尝试? + ``` + api1: http://127.0.0.1:7777/login + api2: http://127.0.0.1:7777/register + api3: http://127.0.0.1:7777/index + ``` +#### 3.6、xiaobaiauto2 >= 0.1.6.6 支持软件自动安装与环境配置 +- 默认环境为用户环境,配置的是用户环境变量,若要配置系统环境变量,请使用管理员运行即可 + ``` + xiaobaiauto2Api -i jdk -v 8 -d D:\ + xiaobaiauto2Api -i jmeter -v 5.3 -d D:\ + xiaobaiauto2Api -i chromedriver -v 88 + xiaobaiauto2Api -i jenkins -d D:\tomcat\webapps + xiaobaiauto2Api -i git + xiaobaiauto2Api -i node -v 15 -d D:\ + ``` +#### 3.7、xiaobaiauto2 >= 0.1.8.3 支持软件自动安装与环境配置 +- 管理系统代理服务器(查看、设置、关闭、验证) + ``` + xiaobaiauto2Proxy -h # 查看帮助文档 + xiaobaiauto2Proxy # 查看系统代理是否开启 + xiaobaiauto2Proxy -e 0 -p 127.0.0.1:8080 # 开启系统代理 + xiaobaiauto2Proxy -e 1 # 关闭系统代理 + xiaobaiauto2Proxy -c 1 # 验证系统代理是否可用 + ``` +#### 3.8、xiaobaiauto2 >= 0.2 支持adb命令,**提前打开APP** +- 单设备监控APP的点击,点击的路径自动生成XPath表达式 + ``` + xiaobaiauto2App + ``` +- 多设备单机监控APP的点击,点击的路径自动生成XPath表达式 + ``` + xiaobaiauto2App -d 127.0.0.1:62001 // 指定设备号进行监控 + xiaobaiauto2App -i 1 // 指定序号为1的设备进行监控 + ``` + +#### 3.9、xiaobaiauto2>=0.2.6 支持验证码自动化识别并填充 + ``` + from xiaobaiauto2.xiaobaiauto2 import verify_check + + ... + # 验证码图片元素定位 + image_element = browser.find_element(by=By.XPATH, value='xpath表达式') + # 验证码输入框元素定位 + input_element = browser.find_element(by=By.XPATH, value='xpath表达式') + verify_check(image_element, input_element) + ``` +#### 4.0、xiaobaiauto2>=0.2.9 支持Browser、Fiddler、Charles导出cURL转为requests代码 + 启动xiaobaiauto2Copy服务: + ``` xiaobaiauto2Copy ``` + - Browser + ``` + F12->network->requst->copy->copy cURL(bash) + ``` + - Fiddler(不推荐,会缺少请求数据) + ``` + File->Export Session->Selected Session->cURL Script + ``` + - Charles + ``` + request->Copy cURL Request + ``` + +#### 4.1、xiaobaiauto2>=0.3.7 支持简化版的Email发送,方便自动化发送邮箱 + - 样例1(执行完用例文件之后,再执行本脚本,即可完成测试报告的及时发送) + ```python +from xiaobaiauto2.utils.xiaobaiauto2Email import xemail + +# 建立连接,password为授权码不是登录密码 +x = xemail(smtp_server='smtp.163.com', smtp_port=25, username='xxx@163.com', password='授权码') +# 发送邮件,to收件人可以多人,files附件可以多个文件,均使用','逗号分割 +x.send(to='1@163.com,2@163.com,3@163.com', subject='自动化测试报告标题', content='报告内容', files='report.html') + + ``` + - 样例2(因为发送邮件被封到teardown_module函数中,所以发送的是上一次执行的结果) + ```python +# filename: test_xiaobai_testcase.py +import pytest +from xiaobaiauto2.utils.xiaobaiauto2Email import xemail + +def test_other(): + ''' 其它测试用例代码 ''' + +def teardown_module(): + # 此处发送的报告是上次测试的结果 + # 建立连接,password为授权码不是登录密码 + x = xemail(smtp_server='smtp.163.com', smtp_port=25, username='xxx@163.com', password='授权码') + # 发送邮件,to收件人可以多人,files附件可以多个文件,均使用','逗号分割 + x.send(to='1@163.com,2@163.com,3@163.com', subject='自动化测试报告标题', content='报告内容', files='report.html') + ``` + +#### 其他帮助 +- [163邮箱怎么开启SMTP发邮件](http://help.163.com/10/0312/13/61J0LI3200752CLQ.html) +- [QQ邮箱怎么开启SMTP发邮件](https://service.mail.qq.com/cgi-bin/help?subtype=1&id=28&no=166) +- [Pytest官网帮助文档](https://learning-pytest.readthedocs.io/zh/latest/doc/intro/getting-started.html) +- [Android调试桥(adb)官网帮助文档](https://developer.android.google.cn/studio/command-line/adb.html) + +## 更新日志 +| 版本 | 功能 | +|:--------|:---------------------------------------------------| +| 0.0.1 | 添加邮件发送,用例排序,chrome提示框禁止等等 | +| 0.1.0.1 | 添加自动执行任务功能及UI界面 | +| 0.1.1 | fix缺陷,cmd执行xiaobaiauto2Timer | +| 0.1.2 | fix缺陷 | +| 0.1.3 | 新增验证码识别,支持 *.png *.jpg *.jpeg ,新增部分关键词(暂已关闭) | +| 0.1.3.1 | fix缺陷 | +| 0.1.4.0 | 新增xiaobaiauto2Api命令行工具,可以将raw请求数据转换成python代码 | +| 0.1.4.1 | fix缺陷 | +| 0.1.4.2 | 优化与新增Fiddler的saz文件支持 | +| 0.1.4.3 | 优化代码 | +| 0.1.4.4 | 优化与新增charles的har文件支持,支持批量脚本转换 | +| 0.1.4.5 | 优化与新增比较两个har文件并转为Python代码 | +| 0.1.4.6 | fix并支持fiddler导出的har文件转为Python代码 | +| 0.1.5.0 | fix并优化api_action | +| 0.1.5.1 | 优化xiaobaiauto2Api与web_action支持cmd调用关键词 | +| 0.1.5.2 | 新增apiTestCase装饰器 | +| 0.1.5.3 | 修复xiaobaiauto2Api部分bug | +| 0.1.5.4 | fix | +| 0.1.5.5 | add 选项-t template 参考xiaobaiauto2Api -h | +| 0.1.5.6 | fix | +| 0.1.5.7 | fix | +| 0.1.6.0 | add 参数化符{变量}系统自动识别并替换为预设值 | +| 0.1.6.1 | fix | +| 0.1.6.2 | fix | +| 0.1.6.3 | add -i, -v 新增命令行安装软件支持mac系统 | +| 0.1.6.4 | fix | +| 0.1.6.5 | add mock模拟接口 | +| 0.1.6.6 | 优化 -i -v 支持jdk jmeter chromdriver jenkins git node | +| 0.1.7.0 | fix | +| 0.1.7.1 | fix -i 新增支持allure与svn | +| 0.1.7.2 | fix -x 新增支持转为jmeter(*.jmx)脚本 | +| 0.1.7.3 | fix | +| 0.1.7.5 | fix | +| 0.1.7.6 | 优化jmx数据格式 | +| 0.1.7.7 | 优化 | +| 0.1.8.0 | 优化jmx数据格式 | +| 0.1.8.1 | 优化jmx的参数化实现 | +| 0.1.8.2 | 优化jmx的实现 | +| 0.1.8.3 | 新增xiaobaiauto2Proxy系统代理管理模块 | +| 0.1.8.5 | 优化jmx的实现 | +| 0.1.8.6 | 优化jmx的实现 | +| 0.1.8.7 | 优化jmx的实现 | +| 0.1.8.8 | 优化xiaobaiauto2App | +| 0.1.9 | 优化xiaobaiauto2App | +| 0.1.9.1 | 优化mac的环境变量设置 | +| 0.1.9.2 | fix | +| 0.1.9.3 | fix | +| 0.1.9.5 | fix | +| 0.1.9.6 | 新增xiaobaiauto2安装软件tomcat | +| 0.1.9.7 | fix | +| 0.1.9.8 | fix 支持下载fiddler与postman | +| 0.1.9.9 | fix 模板的下载路径报错问题 | +| 0.2 | xiaobaiauto2App | +| 0.2.1 | 更新 | +| 0.2.2 | fixed | +| 0.2.3 | fix关键词与xiaobaiauto2App的BUG | +| 0.2.5 | 优化xiaobaiauto2App输出代码结构 | +| 0.2.7 | 新增验证码识别verify_check,库存在兼容问题,自行安装依赖! | +| 0.2.8 | 新增浏览器copy->cURL(bash转requests代码) | | +| 0.2.9 | 新增Fiddler/Charles->cURL(bash转requests代码) | +| 0.3 | 优化代码,修复BUG | +| 0.3.1 | 优化代码,修复BUG | +| 0.3.2 | 优化代码 | +| 0.3.3 | 优化代码 | +| 0.3.5 | Fix BUG | +| 0.3.6 | 优化xiaobaiauto2Email新增简化版邮件发送 | +| 0.3.7 | 优化xiaobaiauto2Email | +| 0.5 | 优化软件安装,window默认系统环境变量设置且立即生效 | +| 0.5.1 | Fix BUG | + + + +%package -n python3-xiaobaiauto2 +Summary: xiaobaiauto2是对自动化框架的第三次更新,功能覆盖UI自动化与API自动化意在帮助对自动化有更多需求且过多时间写代码的人群,让大家的时间花在业务的实现上 +Provides: python-xiaobaiauto2 +BuildRequires: python3-devel +BuildRequires: python3-setuptools +BuildRequires: python3-pip +%description -n python3-xiaobaiauto2 +[](https://pepy.tech/project/xiaobaiauto2) +[](https://pepy.tech/project/xiaobaiauto2/month) +[](https://pepy.tech/project/xiaobaiauto2/week) +[](https://img.shields.io/badge/xiaobaiauto2-success-green) + +# 简介 + xiaobaiauto2是一套自动化框架,功能覆盖UI自动化与API自动化 + 意在帮助对自动化有更多需求且过多时间写代码的人群,让大家的时间 + 花在业务的实现上 +## 架构 + +## 开始使用 +#### 了解测试用例目录 + test + | + |--__init__.py + | + |--WebTest + | | + | |--conftest.py + | |--test_WebUI.py + | + |--APPTest + | | + | |--conftest.py + | |--test_Xiaobai_APP_Case1.py + | |--test_Xiaobai_APP_Case2.py + | + |--APITest + | | + | |--test_cases.py + | |--yewua.py + +#### 了解关键词 +| 序号 | CMD | key | +| :--- | :--- |:------------| +| 1 | 打开网页 | OPENURL | +|2 | 点击 | CLICK | +|3 | 输入 | SENDKEY | +|4 | 刷新 | REFRESH | +|5 | 后退 | BACK | +|6 | 关闭 | CLOSE | +|7 | 退出 | QUIT | +|8 | 标签 | TAG | +|9 | 属性 | ATTR | +|10 | URL | CURL | +|11 | 标题 | ITLE | +|12 | 内嵌页 | FRAME | +|13 | 标签页[序号(1开始)] | WINDOW | +|14 | JS_确定 | ALERT0 | +|15 | JS_取消 | ALERT1 | +|16 | JS_输入框 | ALERT2 | +|17 | JS_文本 | ALERT3 | +|18 | 停止 | WAIT | +|19 | 脚本 | SCRIPT | +|20 | 添加cookie | ADDCOOKIE | +|21 | 滑屏 | SWIPE | +|22 | 截屏 | DSCREENSHOT | +|23 | 元素截图 | ESCREENSHOT | +|24 | 识别验证码 | FINDTEXT | +|25 | 坐标 | LOCATION | +|26 | 网页源码 | PAGESOURCE | + +#### 修改脚本 +参考test目录下面的脚本 + + @pytest.mark.xiaobai_web + def test_Case1(browser): + web_action(browser, cmd=cmd.打开网页, loc='', data='http://www.baidu.com') + web_action(browser, cmd=cmd.输入, loc='//*[@id="kw"]', data='小白科技') + web_action(browser, cmd=cmd.点击, loc='//*[@id="su"]') + web_action(browser, cmd=cmd.wait, data=3) + web_action(browser, cmd=cmd.标题, contains_assert='小白') + +关键词的使用,看上面示例亦可(xiaobaiauto2>0.1.5.0) + + - 1 导入cmd类 + + from xiaobaiauto2.xiaobaiauto2 import cmd + + - 2 cmd类调用属性 + + cmd.关键词 + +若感觉关键词不足以使用,可以直接使用原生方法,示例如下 + + browser.find_element(by=By.ID, value='id属性值').click() + +代码执行之前,若您需要发送邮件,请将`test_first`方法中的`email`的参数值进行自行修改即可 + +##### 备注 +- 若APP测试需要获取toast信息可以写一个方法添加到自己的项目中,代码样例如下: + ``` + def find_toast(self, message, timeout, poll_frequency): + new_message = f"//*[@text=\'{message}\']" + element = WebDriverWait(self.driver, timeout, poll_frequency).until( + EC.presence_of_element_located((By.XPATH, new_message))) + return element.text + ``` + +### 使用 +#### 1、命令行运行脚本 + pytest --html=report.html --self-contained-html + or + pytest --html=report.html --self-contained-html -m xiaobai_web + or + pytest --html=report.html --self-contained-html -o log_cli=true -o log_cli_level=INFO + +#### 2、定时任务界面运行脚本(CMD命令) + xiaobaiauto2Timer +  + +#### 3.1、xiaobaiauto2Api将raw数据转换成python代码(版本>0.1.3.1可用) + xiaobaiauto2Api -h # 帮助文档提示 + xiaobaiauto2Api -f *.txt -s *.py + xiaobaiauto2Api -f *.txt -x 2 + xiaobaiauto2Api -f *.saz -x 2 + xiaobaiauto2Api -f *.har -x 2 + xiaobaiauto2Api -f *.har -x 3 + xiaobaiauto2Api -d D:\example + +#### 3.2、xiaobaiauto2 >= 0.1.4.5 支持c参数 + xiaobaiauto2Api -c 1 -f 1.har,2.har + xiaobaiauto2Api -c 1 -f 1.har,2.har -d E:\example + xiaobaiauto2Api -c 1 -f 1.har,2.har -d E:\example -s 1_2_compare + xiaobaiauto2Api -c 1 -f 1.har.2.har -d E:\example -x 3 # 生成*.jmx(含提取器、参数化)[>=0.1.7.2] +#### 3.3、xiaobaiauto2 >= 0.1.5.5 支持t参数 + xiaobaiauto2Api -t api // 生成api测试模板 + xiaobaiauto2Api -t web // 生成web测试模板 + xiaobaiauto2Api -t app // 生成app测试模板 + +#### 3.4、xiaobaiauto2 >= 0.1.6.3 支持i与v参数(请看3.6) 不指定版本默认安装最新版哦 + xiaobaiauto2Api -i jdk -v 8 // 安装jdk8 + xiaobaiauto2Api -i jmeter -v 5.3 // 安装jmeter5.3 + xiaobaiauto2Api -i chromedriver -v 88 // 安装chromedriver的88版本 + xiaobaiauto2Api -i allure -d "D:\Program Files" // 安装allure(会有些慢哦) + +#### 3.5、xiaobaiauto2 >= 0.1.6.5 支持mock模拟接口 + from xiaobaiauto2.xiaobaiauto2 import mock, MockServer + + @mock(uri='/login', response={"errcode": 200, "msg": "登录成功", "data": {"token": "123456"}}) + @mock(uri='/register', response={"errcode": 200, "msg": "注册成功", "data": {}}) + @MockServer(uri='/index', response={"errcode": 200, "msg": "首页成功", "data": {}}) + def run(): pass + + if __name__ == '__main__': + run(port=7777) +- 导入mock方法 + ``` + from xiaobaiauto2.xiaobaiauto2 import mock, MockServer + ``` + +- 定义mock接口,mock与MockServer无区别,uri为接口路径,response为接口返回值,run为被装饰的函数名称可自定义 + ``` + @mock(uri='/login', response={"errcode": 200, "msg": "登录成功", "data": {"token": "123456"}}) + @mock(uri='/register', response={"errcode": 200, "msg": "注册成功", "data": {}}) + @MockServer(uri='/index', response={"errcode": 200, "msg": "首页成功", "data": {}}) + def run(): pass + ``` +- 启动mock接口服务, run为上面被装饰的方法名,port为监听的端口(默认6666) + ``` + if __name__ == '__main__': + run(port=7777) + ``` +- jmeter尝试? + ``` + api1: http://127.0.0.1:7777/login + api2: http://127.0.0.1:7777/register + api3: http://127.0.0.1:7777/index + ``` +#### 3.6、xiaobaiauto2 >= 0.1.6.6 支持软件自动安装与环境配置 +- 默认环境为用户环境,配置的是用户环境变量,若要配置系统环境变量,请使用管理员运行即可 + ``` + xiaobaiauto2Api -i jdk -v 8 -d D:\ + xiaobaiauto2Api -i jmeter -v 5.3 -d D:\ + xiaobaiauto2Api -i chromedriver -v 88 + xiaobaiauto2Api -i jenkins -d D:\tomcat\webapps + xiaobaiauto2Api -i git + xiaobaiauto2Api -i node -v 15 -d D:\ + ``` +#### 3.7、xiaobaiauto2 >= 0.1.8.3 支持软件自动安装与环境配置 +- 管理系统代理服务器(查看、设置、关闭、验证) + ``` + xiaobaiauto2Proxy -h # 查看帮助文档 + xiaobaiauto2Proxy # 查看系统代理是否开启 + xiaobaiauto2Proxy -e 0 -p 127.0.0.1:8080 # 开启系统代理 + xiaobaiauto2Proxy -e 1 # 关闭系统代理 + xiaobaiauto2Proxy -c 1 # 验证系统代理是否可用 + ``` +#### 3.8、xiaobaiauto2 >= 0.2 支持adb命令,**提前打开APP** +- 单设备监控APP的点击,点击的路径自动生成XPath表达式 + ``` + xiaobaiauto2App + ``` +- 多设备单机监控APP的点击,点击的路径自动生成XPath表达式 + ``` + xiaobaiauto2App -d 127.0.0.1:62001 // 指定设备号进行监控 + xiaobaiauto2App -i 1 // 指定序号为1的设备进行监控 + ``` + +#### 3.9、xiaobaiauto2>=0.2.6 支持验证码自动化识别并填充 + ``` + from xiaobaiauto2.xiaobaiauto2 import verify_check + + ... + # 验证码图片元素定位 + image_element = browser.find_element(by=By.XPATH, value='xpath表达式') + # 验证码输入框元素定位 + input_element = browser.find_element(by=By.XPATH, value='xpath表达式') + verify_check(image_element, input_element) + ``` +#### 4.0、xiaobaiauto2>=0.2.9 支持Browser、Fiddler、Charles导出cURL转为requests代码 + 启动xiaobaiauto2Copy服务: + ``` xiaobaiauto2Copy ``` + - Browser + ``` + F12->network->requst->copy->copy cURL(bash) + ``` + - Fiddler(不推荐,会缺少请求数据) + ``` + File->Export Session->Selected Session->cURL Script + ``` + - Charles + ``` + request->Copy cURL Request + ``` + +#### 4.1、xiaobaiauto2>=0.3.7 支持简化版的Email发送,方便自动化发送邮箱 + - 样例1(执行完用例文件之后,再执行本脚本,即可完成测试报告的及时发送) + ```python +from xiaobaiauto2.utils.xiaobaiauto2Email import xemail + +# 建立连接,password为授权码不是登录密码 +x = xemail(smtp_server='smtp.163.com', smtp_port=25, username='xxx@163.com', password='授权码') +# 发送邮件,to收件人可以多人,files附件可以多个文件,均使用','逗号分割 +x.send(to='1@163.com,2@163.com,3@163.com', subject='自动化测试报告标题', content='报告内容', files='report.html') + + ``` + - 样例2(因为发送邮件被封到teardown_module函数中,所以发送的是上一次执行的结果) + ```python +# filename: test_xiaobai_testcase.py +import pytest +from xiaobaiauto2.utils.xiaobaiauto2Email import xemail + +def test_other(): + ''' 其它测试用例代码 ''' + +def teardown_module(): + # 此处发送的报告是上次测试的结果 + # 建立连接,password为授权码不是登录密码 + x = xemail(smtp_server='smtp.163.com', smtp_port=25, username='xxx@163.com', password='授权码') + # 发送邮件,to收件人可以多人,files附件可以多个文件,均使用','逗号分割 + x.send(to='1@163.com,2@163.com,3@163.com', subject='自动化测试报告标题', content='报告内容', files='report.html') + ``` + +#### 其他帮助 +- [163邮箱怎么开启SMTP发邮件](http://help.163.com/10/0312/13/61J0LI3200752CLQ.html) +- [QQ邮箱怎么开启SMTP发邮件](https://service.mail.qq.com/cgi-bin/help?subtype=1&id=28&no=166) +- [Pytest官网帮助文档](https://learning-pytest.readthedocs.io/zh/latest/doc/intro/getting-started.html) +- [Android调试桥(adb)官网帮助文档](https://developer.android.google.cn/studio/command-line/adb.html) + +## 更新日志 +| 版本 | 功能 | +|:--------|:---------------------------------------------------| +| 0.0.1 | 添加邮件发送,用例排序,chrome提示框禁止等等 | +| 0.1.0.1 | 添加自动执行任务功能及UI界面 | +| 0.1.1 | fix缺陷,cmd执行xiaobaiauto2Timer | +| 0.1.2 | fix缺陷 | +| 0.1.3 | 新增验证码识别,支持 *.png *.jpg *.jpeg ,新增部分关键词(暂已关闭) | +| 0.1.3.1 | fix缺陷 | +| 0.1.4.0 | 新增xiaobaiauto2Api命令行工具,可以将raw请求数据转换成python代码 | +| 0.1.4.1 | fix缺陷 | +| 0.1.4.2 | 优化与新增Fiddler的saz文件支持 | +| 0.1.4.3 | 优化代码 | +| 0.1.4.4 | 优化与新增charles的har文件支持,支持批量脚本转换 | +| 0.1.4.5 | 优化与新增比较两个har文件并转为Python代码 | +| 0.1.4.6 | fix并支持fiddler导出的har文件转为Python代码 | +| 0.1.5.0 | fix并优化api_action | +| 0.1.5.1 | 优化xiaobaiauto2Api与web_action支持cmd调用关键词 | +| 0.1.5.2 | 新增apiTestCase装饰器 | +| 0.1.5.3 | 修复xiaobaiauto2Api部分bug | +| 0.1.5.4 | fix | +| 0.1.5.5 | add 选项-t template 参考xiaobaiauto2Api -h | +| 0.1.5.6 | fix | +| 0.1.5.7 | fix | +| 0.1.6.0 | add 参数化符{变量}系统自动识别并替换为预设值 | +| 0.1.6.1 | fix | +| 0.1.6.2 | fix | +| 0.1.6.3 | add -i, -v 新增命令行安装软件支持mac系统 | +| 0.1.6.4 | fix | +| 0.1.6.5 | add mock模拟接口 | +| 0.1.6.6 | 优化 -i -v 支持jdk jmeter chromdriver jenkins git node | +| 0.1.7.0 | fix | +| 0.1.7.1 | fix -i 新增支持allure与svn | +| 0.1.7.2 | fix -x 新增支持转为jmeter(*.jmx)脚本 | +| 0.1.7.3 | fix | +| 0.1.7.5 | fix | +| 0.1.7.6 | 优化jmx数据格式 | +| 0.1.7.7 | 优化 | +| 0.1.8.0 | 优化jmx数据格式 | +| 0.1.8.1 | 优化jmx的参数化实现 | +| 0.1.8.2 | 优化jmx的实现 | +| 0.1.8.3 | 新增xiaobaiauto2Proxy系统代理管理模块 | +| 0.1.8.5 | 优化jmx的实现 | +| 0.1.8.6 | 优化jmx的实现 | +| 0.1.8.7 | 优化jmx的实现 | +| 0.1.8.8 | 优化xiaobaiauto2App | +| 0.1.9 | 优化xiaobaiauto2App | +| 0.1.9.1 | 优化mac的环境变量设置 | +| 0.1.9.2 | fix | +| 0.1.9.3 | fix | +| 0.1.9.5 | fix | +| 0.1.9.6 | 新增xiaobaiauto2安装软件tomcat | +| 0.1.9.7 | fix | +| 0.1.9.8 | fix 支持下载fiddler与postman | +| 0.1.9.9 | fix 模板的下载路径报错问题 | +| 0.2 | xiaobaiauto2App | +| 0.2.1 | 更新 | +| 0.2.2 | fixed | +| 0.2.3 | fix关键词与xiaobaiauto2App的BUG | +| 0.2.5 | 优化xiaobaiauto2App输出代码结构 | +| 0.2.7 | 新增验证码识别verify_check,库存在兼容问题,自行安装依赖! | +| 0.2.8 | 新增浏览器copy->cURL(bash转requests代码) | | +| 0.2.9 | 新增Fiddler/Charles->cURL(bash转requests代码) | +| 0.3 | 优化代码,修复BUG | +| 0.3.1 | 优化代码,修复BUG | +| 0.3.2 | 优化代码 | +| 0.3.3 | 优化代码 | +| 0.3.5 | Fix BUG | +| 0.3.6 | 优化xiaobaiauto2Email新增简化版邮件发送 | +| 0.3.7 | 优化xiaobaiauto2Email | +| 0.5 | 优化软件安装,window默认系统环境变量设置且立即生效 | +| 0.5.1 | Fix BUG | + + + +%package help +Summary: Development documents and examples for xiaobaiauto2 +Provides: python3-xiaobaiauto2-doc +%description help +[](https://pepy.tech/project/xiaobaiauto2) +[](https://pepy.tech/project/xiaobaiauto2/month) +[](https://pepy.tech/project/xiaobaiauto2/week) +[](https://img.shields.io/badge/xiaobaiauto2-success-green) + +# 简介 + xiaobaiauto2是一套自动化框架,功能覆盖UI自动化与API自动化 + 意在帮助对自动化有更多需求且过多时间写代码的人群,让大家的时间 + 花在业务的实现上 +## 架构 + +## 开始使用 +#### 了解测试用例目录 + test + | + |--__init__.py + | + |--WebTest + | | + | |--conftest.py + | |--test_WebUI.py + | + |--APPTest + | | + | |--conftest.py + | |--test_Xiaobai_APP_Case1.py + | |--test_Xiaobai_APP_Case2.py + | + |--APITest + | | + | |--test_cases.py + | |--yewua.py + +#### 了解关键词 +| 序号 | CMD | key | +| :--- | :--- |:------------| +| 1 | 打开网页 | OPENURL | +|2 | 点击 | CLICK | +|3 | 输入 | SENDKEY | +|4 | 刷新 | REFRESH | +|5 | 后退 | BACK | +|6 | 关闭 | CLOSE | +|7 | 退出 | QUIT | +|8 | 标签 | TAG | +|9 | 属性 | ATTR | +|10 | URL | CURL | +|11 | 标题 | ITLE | +|12 | 内嵌页 | FRAME | +|13 | 标签页[序号(1开始)] | WINDOW | +|14 | JS_确定 | ALERT0 | +|15 | JS_取消 | ALERT1 | +|16 | JS_输入框 | ALERT2 | +|17 | JS_文本 | ALERT3 | +|18 | 停止 | WAIT | +|19 | 脚本 | SCRIPT | +|20 | 添加cookie | ADDCOOKIE | +|21 | 滑屏 | SWIPE | +|22 | 截屏 | DSCREENSHOT | +|23 | 元素截图 | ESCREENSHOT | +|24 | 识别验证码 | FINDTEXT | +|25 | 坐标 | LOCATION | +|26 | 网页源码 | PAGESOURCE | + +#### 修改脚本 +参考test目录下面的脚本 + + @pytest.mark.xiaobai_web + def test_Case1(browser): + web_action(browser, cmd=cmd.打开网页, loc='', data='http://www.baidu.com') + web_action(browser, cmd=cmd.输入, loc='//*[@id="kw"]', data='小白科技') + web_action(browser, cmd=cmd.点击, loc='//*[@id="su"]') + web_action(browser, cmd=cmd.wait, data=3) + web_action(browser, cmd=cmd.标题, contains_assert='小白') + +关键词的使用,看上面示例亦可(xiaobaiauto2>0.1.5.0) + + - 1 导入cmd类 + + from xiaobaiauto2.xiaobaiauto2 import cmd + + - 2 cmd类调用属性 + + cmd.关键词 + +若感觉关键词不足以使用,可以直接使用原生方法,示例如下 + + browser.find_element(by=By.ID, value='id属性值').click() + +代码执行之前,若您需要发送邮件,请将`test_first`方法中的`email`的参数值进行自行修改即可 + +##### 备注 +- 若APP测试需要获取toast信息可以写一个方法添加到自己的项目中,代码样例如下: + ``` + def find_toast(self, message, timeout, poll_frequency): + new_message = f"//*[@text=\'{message}\']" + element = WebDriverWait(self.driver, timeout, poll_frequency).until( + EC.presence_of_element_located((By.XPATH, new_message))) + return element.text + ``` + +### 使用 +#### 1、命令行运行脚本 + pytest --html=report.html --self-contained-html + or + pytest --html=report.html --self-contained-html -m xiaobai_web + or + pytest --html=report.html --self-contained-html -o log_cli=true -o log_cli_level=INFO + +#### 2、定时任务界面运行脚本(CMD命令) + xiaobaiauto2Timer +  + +#### 3.1、xiaobaiauto2Api将raw数据转换成python代码(版本>0.1.3.1可用) + xiaobaiauto2Api -h # 帮助文档提示 + xiaobaiauto2Api -f *.txt -s *.py + xiaobaiauto2Api -f *.txt -x 2 + xiaobaiauto2Api -f *.saz -x 2 + xiaobaiauto2Api -f *.har -x 2 + xiaobaiauto2Api -f *.har -x 3 + xiaobaiauto2Api -d D:\example + +#### 3.2、xiaobaiauto2 >= 0.1.4.5 支持c参数 + xiaobaiauto2Api -c 1 -f 1.har,2.har + xiaobaiauto2Api -c 1 -f 1.har,2.har -d E:\example + xiaobaiauto2Api -c 1 -f 1.har,2.har -d E:\example -s 1_2_compare + xiaobaiauto2Api -c 1 -f 1.har.2.har -d E:\example -x 3 # 生成*.jmx(含提取器、参数化)[>=0.1.7.2] +#### 3.3、xiaobaiauto2 >= 0.1.5.5 支持t参数 + xiaobaiauto2Api -t api // 生成api测试模板 + xiaobaiauto2Api -t web // 生成web测试模板 + xiaobaiauto2Api -t app // 生成app测试模板 + +#### 3.4、xiaobaiauto2 >= 0.1.6.3 支持i与v参数(请看3.6) 不指定版本默认安装最新版哦 + xiaobaiauto2Api -i jdk -v 8 // 安装jdk8 + xiaobaiauto2Api -i jmeter -v 5.3 // 安装jmeter5.3 + xiaobaiauto2Api -i chromedriver -v 88 // 安装chromedriver的88版本 + xiaobaiauto2Api -i allure -d "D:\Program Files" // 安装allure(会有些慢哦) + +#### 3.5、xiaobaiauto2 >= 0.1.6.5 支持mock模拟接口 + from xiaobaiauto2.xiaobaiauto2 import mock, MockServer + + @mock(uri='/login', response={"errcode": 200, "msg": "登录成功", "data": {"token": "123456"}}) + @mock(uri='/register', response={"errcode": 200, "msg": "注册成功", "data": {}}) + @MockServer(uri='/index', response={"errcode": 200, "msg": "首页成功", "data": {}}) + def run(): pass + + if __name__ == '__main__': + run(port=7777) +- 导入mock方法 + ``` + from xiaobaiauto2.xiaobaiauto2 import mock, MockServer + ``` + +- 定义mock接口,mock与MockServer无区别,uri为接口路径,response为接口返回值,run为被装饰的函数名称可自定义 + ``` + @mock(uri='/login', response={"errcode": 200, "msg": "登录成功", "data": {"token": "123456"}}) + @mock(uri='/register', response={"errcode": 200, "msg": "注册成功", "data": {}}) + @MockServer(uri='/index', response={"errcode": 200, "msg": "首页成功", "data": {}}) + def run(): pass + ``` +- 启动mock接口服务, run为上面被装饰的方法名,port为监听的端口(默认6666) + ``` + if __name__ == '__main__': + run(port=7777) + ``` +- jmeter尝试? + ``` + api1: http://127.0.0.1:7777/login + api2: http://127.0.0.1:7777/register + api3: http://127.0.0.1:7777/index + ``` +#### 3.6、xiaobaiauto2 >= 0.1.6.6 支持软件自动安装与环境配置 +- 默认环境为用户环境,配置的是用户环境变量,若要配置系统环境变量,请使用管理员运行即可 + ``` + xiaobaiauto2Api -i jdk -v 8 -d D:\ + xiaobaiauto2Api -i jmeter -v 5.3 -d D:\ + xiaobaiauto2Api -i chromedriver -v 88 + xiaobaiauto2Api -i jenkins -d D:\tomcat\webapps + xiaobaiauto2Api -i git + xiaobaiauto2Api -i node -v 15 -d D:\ + ``` +#### 3.7、xiaobaiauto2 >= 0.1.8.3 支持软件自动安装与环境配置 +- 管理系统代理服务器(查看、设置、关闭、验证) + ``` + xiaobaiauto2Proxy -h # 查看帮助文档 + xiaobaiauto2Proxy # 查看系统代理是否开启 + xiaobaiauto2Proxy -e 0 -p 127.0.0.1:8080 # 开启系统代理 + xiaobaiauto2Proxy -e 1 # 关闭系统代理 + xiaobaiauto2Proxy -c 1 # 验证系统代理是否可用 + ``` +#### 3.8、xiaobaiauto2 >= 0.2 支持adb命令,**提前打开APP** +- 单设备监控APP的点击,点击的路径自动生成XPath表达式 + ``` + xiaobaiauto2App + ``` +- 多设备单机监控APP的点击,点击的路径自动生成XPath表达式 + ``` + xiaobaiauto2App -d 127.0.0.1:62001 // 指定设备号进行监控 + xiaobaiauto2App -i 1 // 指定序号为1的设备进行监控 + ``` + +#### 3.9、xiaobaiauto2>=0.2.6 支持验证码自动化识别并填充 + ``` + from xiaobaiauto2.xiaobaiauto2 import verify_check + + ... + # 验证码图片元素定位 + image_element = browser.find_element(by=By.XPATH, value='xpath表达式') + # 验证码输入框元素定位 + input_element = browser.find_element(by=By.XPATH, value='xpath表达式') + verify_check(image_element, input_element) + ``` +#### 4.0、xiaobaiauto2>=0.2.9 支持Browser、Fiddler、Charles导出cURL转为requests代码 + 启动xiaobaiauto2Copy服务: + ``` xiaobaiauto2Copy ``` + - Browser + ``` + F12->network->requst->copy->copy cURL(bash) + ``` + - Fiddler(不推荐,会缺少请求数据) + ``` + File->Export Session->Selected Session->cURL Script + ``` + - Charles + ``` + request->Copy cURL Request + ``` + +#### 4.1、xiaobaiauto2>=0.3.7 支持简化版的Email发送,方便自动化发送邮箱 + - 样例1(执行完用例文件之后,再执行本脚本,即可完成测试报告的及时发送) + ```python +from xiaobaiauto2.utils.xiaobaiauto2Email import xemail + +# 建立连接,password为授权码不是登录密码 +x = xemail(smtp_server='smtp.163.com', smtp_port=25, username='xxx@163.com', password='授权码') +# 发送邮件,to收件人可以多人,files附件可以多个文件,均使用','逗号分割 +x.send(to='1@163.com,2@163.com,3@163.com', subject='自动化测试报告标题', content='报告内容', files='report.html') + + ``` + - 样例2(因为发送邮件被封到teardown_module函数中,所以发送的是上一次执行的结果) + ```python +# filename: test_xiaobai_testcase.py +import pytest +from xiaobaiauto2.utils.xiaobaiauto2Email import xemail + +def test_other(): + ''' 其它测试用例代码 ''' + +def teardown_module(): + # 此处发送的报告是上次测试的结果 + # 建立连接,password为授权码不是登录密码 + x = xemail(smtp_server='smtp.163.com', smtp_port=25, username='xxx@163.com', password='授权码') + # 发送邮件,to收件人可以多人,files附件可以多个文件,均使用','逗号分割 + x.send(to='1@163.com,2@163.com,3@163.com', subject='自动化测试报告标题', content='报告内容', files='report.html') + ``` + +#### 其他帮助 +- [163邮箱怎么开启SMTP发邮件](http://help.163.com/10/0312/13/61J0LI3200752CLQ.html) +- [QQ邮箱怎么开启SMTP发邮件](https://service.mail.qq.com/cgi-bin/help?subtype=1&id=28&no=166) +- [Pytest官网帮助文档](https://learning-pytest.readthedocs.io/zh/latest/doc/intro/getting-started.html) +- [Android调试桥(adb)官网帮助文档](https://developer.android.google.cn/studio/command-line/adb.html) + +## 更新日志 +| 版本 | 功能 | +|:--------|:---------------------------------------------------| +| 0.0.1 | 添加邮件发送,用例排序,chrome提示框禁止等等 | +| 0.1.0.1 | 添加自动执行任务功能及UI界面 | +| 0.1.1 | fix缺陷,cmd执行xiaobaiauto2Timer | +| 0.1.2 | fix缺陷 | +| 0.1.3 | 新增验证码识别,支持 *.png *.jpg *.jpeg ,新增部分关键词(暂已关闭) | +| 0.1.3.1 | fix缺陷 | +| 0.1.4.0 | 新增xiaobaiauto2Api命令行工具,可以将raw请求数据转换成python代码 | +| 0.1.4.1 | fix缺陷 | +| 0.1.4.2 | 优化与新增Fiddler的saz文件支持 | +| 0.1.4.3 | 优化代码 | +| 0.1.4.4 | 优化与新增charles的har文件支持,支持批量脚本转换 | +| 0.1.4.5 | 优化与新增比较两个har文件并转为Python代码 | +| 0.1.4.6 | fix并支持fiddler导出的har文件转为Python代码 | +| 0.1.5.0 | fix并优化api_action | +| 0.1.5.1 | 优化xiaobaiauto2Api与web_action支持cmd调用关键词 | +| 0.1.5.2 | 新增apiTestCase装饰器 | +| 0.1.5.3 | 修复xiaobaiauto2Api部分bug | +| 0.1.5.4 | fix | +| 0.1.5.5 | add 选项-t template 参考xiaobaiauto2Api -h | +| 0.1.5.6 | fix | +| 0.1.5.7 | fix | +| 0.1.6.0 | add 参数化符{变量}系统自动识别并替换为预设值 | +| 0.1.6.1 | fix | +| 0.1.6.2 | fix | +| 0.1.6.3 | add -i, -v 新增命令行安装软件支持mac系统 | +| 0.1.6.4 | fix | +| 0.1.6.5 | add mock模拟接口 | +| 0.1.6.6 | 优化 -i -v 支持jdk jmeter chromdriver jenkins git node | +| 0.1.7.0 | fix | +| 0.1.7.1 | fix -i 新增支持allure与svn | +| 0.1.7.2 | fix -x 新增支持转为jmeter(*.jmx)脚本 | +| 0.1.7.3 | fix | +| 0.1.7.5 | fix | +| 0.1.7.6 | 优化jmx数据格式 | +| 0.1.7.7 | 优化 | +| 0.1.8.0 | 优化jmx数据格式 | +| 0.1.8.1 | 优化jmx的参数化实现 | +| 0.1.8.2 | 优化jmx的实现 | +| 0.1.8.3 | 新增xiaobaiauto2Proxy系统代理管理模块 | +| 0.1.8.5 | 优化jmx的实现 | +| 0.1.8.6 | 优化jmx的实现 | +| 0.1.8.7 | 优化jmx的实现 | +| 0.1.8.8 | 优化xiaobaiauto2App | +| 0.1.9 | 优化xiaobaiauto2App | +| 0.1.9.1 | 优化mac的环境变量设置 | +| 0.1.9.2 | fix | +| 0.1.9.3 | fix | +| 0.1.9.5 | fix | +| 0.1.9.6 | 新增xiaobaiauto2安装软件tomcat | +| 0.1.9.7 | fix | +| 0.1.9.8 | fix 支持下载fiddler与postman | +| 0.1.9.9 | fix 模板的下载路径报错问题 | +| 0.2 | xiaobaiauto2App | +| 0.2.1 | 更新 | +| 0.2.2 | fixed | +| 0.2.3 | fix关键词与xiaobaiauto2App的BUG | +| 0.2.5 | 优化xiaobaiauto2App输出代码结构 | +| 0.2.7 | 新增验证码识别verify_check,库存在兼容问题,自行安装依赖! | +| 0.2.8 | 新增浏览器copy->cURL(bash转requests代码) | | +| 0.2.9 | 新增Fiddler/Charles->cURL(bash转requests代码) | +| 0.3 | 优化代码,修复BUG | +| 0.3.1 | 优化代码,修复BUG | +| 0.3.2 | 优化代码 | +| 0.3.3 | 优化代码 | +| 0.3.5 | Fix BUG | +| 0.3.6 | 优化xiaobaiauto2Email新增简化版邮件发送 | +| 0.3.7 | 优化xiaobaiauto2Email | +| 0.5 | 优化软件安装,window默认系统环境变量设置且立即生效 | +| 0.5.1 | Fix BUG | + + + +%prep +%autosetup -n xiaobaiauto2-0.5.1 + +%build +%py3_build + +%install +%py3_install +install -d -m755 %{buildroot}/%{_pkgdocdir} +if [ -d doc ]; then cp -arf doc %{buildroot}/%{_pkgdocdir}; fi +if [ -d docs ]; then cp -arf docs %{buildroot}/%{_pkgdocdir}; fi +if [ -d example ]; then cp -arf example %{buildroot}/%{_pkgdocdir}; fi +if [ -d examples ]; then cp -arf examples %{buildroot}/%{_pkgdocdir}; fi +pushd %{buildroot} +if [ -d usr/lib ]; then + find usr/lib -type f -printf "/%h/%f\n" >> filelist.lst +fi +if [ -d usr/lib64 ]; then + find usr/lib64 -type f -printf "/%h/%f\n" >> filelist.lst +fi +if [ -d usr/bin ]; then + find usr/bin -type f -printf "/%h/%f\n" >> filelist.lst +fi +if [ -d usr/sbin ]; then + find usr/sbin -type f -printf "/%h/%f\n" >> filelist.lst +fi +touch doclist.lst +if [ -d usr/share/man ]; then + find usr/share/man -type f -printf "/%h/%f.gz\n" >> doclist.lst +fi +popd +mv %{buildroot}/filelist.lst . +mv %{buildroot}/doclist.lst . + +%files -n python3-xiaobaiauto2 -f filelist.lst +%dir %{python3_sitelib}/* + +%files help -f doclist.lst +%{_docdir}/* + +%changelog +* Wed May 31 2023 Python_Bot <Python_Bot@openeuler.org> - 0.5.1-1 +- Package Spec generated @@ -0,0 +1 @@ +51675a32e37900e65db21bcf92922080 xiaobaiauto2-0.5.1.tar.gz |