1
2
3
4
5
6
7
8
9
10
11
12
13
14
15
16
17
18
19
20
21
22
23
24
25
26
27
28
29
30
31
32
33
34
35
36
37
38
39
40
41
42
43
44
45
46
47
48
49
50
51
52
53
54
55
56
57
58
59
60
61
62
63
64
65
66
67
68
69
70
71
72
73
74
75
76
77
78
79
80
81
82
83
84
85
86
87
88
89
90
91
92
93
94
95
96
97
98
99
100
101
102
103
104
105
106
107
108
109
110
111
112
113
114
115
116
117
118
119
120
121
122
123
124
125
126
127
128
129
130
131
132
133
134
135
136
137
138
139
140
141
142
143
144
145
146
147
148
149
150
151
152
153
154
155
156
157
158
159
160
161
162
163
164
165
166
167
168
169
170
171
172
173
174
175
176
177
178
179
180
181
182
183
184
185
186
187
188
189
190
191
192
193
194
195
196
197
198
199
200
201
202
203
204
205
206
207
208
209
210
211
212
213
214
215
216
217
218
219
220
221
222
223
224
225
226
227
228
229
230
231
232
233
234
235
236
237
238
239
240
241
242
243
244
245
246
247
248
249
250
251
252
253
254
255
256
257
258
259
260
261
262
263
264
265
266
267
268
269
270
271
272
273
274
275
276
277
278
279
280
281
282
283
284
285
286
287
288
289
290
291
|
%global _empty_manifest_terminate_build 0
Name: python-interactive-kit
Version: 0.1.6
Release: 1
Summary: Interactive viewer for signal processing, image processing, and machine learning
License: MIT License
URL: https://github.com/Biomedical-Imaging-Group/interactive-kit
Source0: https://mirrors.aliyun.com/pypi/web/packages/d2/34/1d6985e90edbfe83dec7f9734c243a073ac30da58cb9898bcbf99d3fa309/interactive-kit-0.1.6.tar.gz
BuildArch: noarch
Requires: python3-numpy
Requires: python3-matplotlib
Requires: python3-jupyter
Requires: python3-ipympl
Requires: python3-ipywidgets
Requires: python3-opencv-python
%description
# `interactive-kit`
A toolkit for interactive visualization of signal and image processing on [Jupyter](https://jupyter.org/) Notebooks.

`interactive-kit` was created to simplify visualization in image and signal processing teaching, learning and research. Using [Jupyter](https://jupyter.org/) Notebooks in combination with `interactive-kit` a user with virtually no programming experience, or without any experience with `matplotlib`, will be able to display and manipulate one or several signals or images and interactively explore them. It is even possible to extract information and perform operations directly on the signal or image without the need to re-run the cell or to plot again.
The class is designed to run in Jupyter Notebooks or Jupyter Lab, using `matplotlib`'s dynamic widget-based environment ([`ipympl`](https://github.com/matplotlib/ipympl)), which needs to be activated with the magic command `%matplotlib widget`. All the functionalities are controlled either through `matplotlib`'s native widgets (zoom, pan, and change of figure size) or through additional `ipywidgets`-based buttons and sliders.
## Modules
#### **Image Viewer** (`imviewer`)
Optimized for image visualization and manipulation. See the dedicated [tutorial](https://github.com/Biomedical-Imaging-Group/interactive-kit/tree/master/tutorials/ImageViewer_Tutorial.ipynb) and [wiki](https://github.com/Biomedical-Imaging-Group/interactive-kit/wiki/Image-Viewer).
##### Main features
Once called, from the `imviewer` and using both widgets and programmatic commands, a user will be able to:
* Plot several images at the same time, and choose different display options (one image at a time, or a customized grid of images),
* Change the brightness and contrast of the images through a slider,
* Explore the histogram of the image,
* Choose different colormaps and visualization options (colorbar, axis),
* Get 1st and 2nd order statistics -updated automatically when zooming into a region- of the image,
* Calculate and visualize differences between two different images,
* Declare functions that perform operations on an image, and through custom widgets, see the effect of the function with different parameters applied on different images, directly inside the `imviewer` object.
#### **Signal Viewer** (`sigviewer`)
Optimized for 1-dimensional signal visualization and manipulation. See the dedicated [tutorial](https://github.com/Biomedical-Imaging-Group/interactive-kit/tree/master/tutorials/SignalViewer_Tutorial.ipynb) and [wiki](https://github.com/Biomedical-Imaging-Group/interactive-kit/wiki/Signal-Viewer).
<!-- ### **Decision Boundary Viewer** (`boundviewer`) -->
## Installation and usage
First, make sure you have installed Python 3.6 or higher. Then, `interactive-kit` can easily be installed through PyPI:
```
pip install interactive-kit==0.1rc3
```
To use in a jupyter notebook, you can import the modules in the following way:
```python
from interactive_kit import imviewer, sigviewer
```
## Team
The viewer was developed at the [EPFL's Biomedical Imaging Group](https://bigwww.epfl.ch/), mainly by
* Alejandro Noguerón Aramburu (alejandro.nogueronaramburu@epfl.ch, [Alejandro-1996](https://github.com/Alejandro-1996))
with contributions from
* Kay Lächler (kay.lachler@epfl.ch, [TheUser0571](https://github.com/TheUser0571))
* [Pol del Aguila Pla](https://poldap.github.io), (pol.delaguilapla@epfl.ch, [poldap](https://github.com/poldap))
* [Daniel Sage ](http://bigwww.epfl.ch/sage/index.html), (daniel.sage@epfl.ch, [dasv74](https://github.com/dasv74))
The development of the viewer was supported by the [Digital Resources for Instruction and Learning (DRIL) Fund](https://www.epfl.ch/education/educational-initiatives/cede/digitaltools/dril/) at EPFL, which supported the projects _IPLAB – Image Processing Laboratories on Noto_ and _FeedbackNow – Automatic grading and formative feedback for image processing laboratories_ by Pol del Aguila Pla and Daniel Sage in the sprint and fall semesters of 2020, respectively. See the video below for more information.
[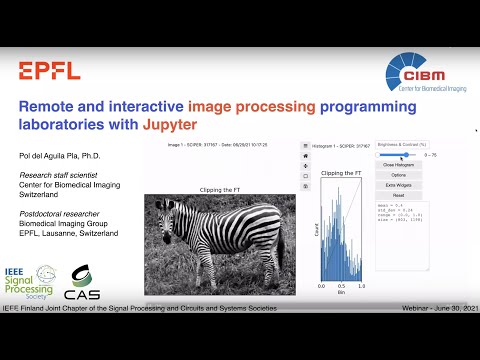](http://www.youtube.com/watch?v=AF18wN37B6Q "Image Processing Labs with Jupyter")
### Members of the EPFL community
If you want to start using `interactive-kit` rightaway, without going through the process of installing Python and Jupyter, you can [click here](https://noto.epfl.ch/hub/user-redirect/git-pull?repo=https%3A%2F%2Fgithub.com%2FBiomedical-Imaging-Group%2FIPLabImageViewer&urlpath=tree%2FIPLabImageViewer%2FIPLabViewer_Tutorial.ipynb&branch=master) and start using right away from [Noto](https://www.epfl.ch/education/educational-initiatives/cede/digitaltools/noto/), EPFL's Jupyter centralized platform.
## Contributions
We appreciate contributions, feedback and bug reports from the community:
* If you encounter any bug, please open an issue and describe. We will try to fix it or give you a workaround as soon as possible.
* If you wish to contribute, fork the repository and then open a pull request.
%package -n python3-interactive-kit
Summary: Interactive viewer for signal processing, image processing, and machine learning
Provides: python-interactive-kit
BuildRequires: python3-devel
BuildRequires: python3-setuptools
BuildRequires: python3-pip
%description -n python3-interactive-kit
# `interactive-kit`
A toolkit for interactive visualization of signal and image processing on [Jupyter](https://jupyter.org/) Notebooks.

`interactive-kit` was created to simplify visualization in image and signal processing teaching, learning and research. Using [Jupyter](https://jupyter.org/) Notebooks in combination with `interactive-kit` a user with virtually no programming experience, or without any experience with `matplotlib`, will be able to display and manipulate one or several signals or images and interactively explore them. It is even possible to extract information and perform operations directly on the signal or image without the need to re-run the cell or to plot again.
The class is designed to run in Jupyter Notebooks or Jupyter Lab, using `matplotlib`'s dynamic widget-based environment ([`ipympl`](https://github.com/matplotlib/ipympl)), which needs to be activated with the magic command `%matplotlib widget`. All the functionalities are controlled either through `matplotlib`'s native widgets (zoom, pan, and change of figure size) or through additional `ipywidgets`-based buttons and sliders.
## Modules
#### **Image Viewer** (`imviewer`)
Optimized for image visualization and manipulation. See the dedicated [tutorial](https://github.com/Biomedical-Imaging-Group/interactive-kit/tree/master/tutorials/ImageViewer_Tutorial.ipynb) and [wiki](https://github.com/Biomedical-Imaging-Group/interactive-kit/wiki/Image-Viewer).
##### Main features
Once called, from the `imviewer` and using both widgets and programmatic commands, a user will be able to:
* Plot several images at the same time, and choose different display options (one image at a time, or a customized grid of images),
* Change the brightness and contrast of the images through a slider,
* Explore the histogram of the image,
* Choose different colormaps and visualization options (colorbar, axis),
* Get 1st and 2nd order statistics -updated automatically when zooming into a region- of the image,
* Calculate and visualize differences between two different images,
* Declare functions that perform operations on an image, and through custom widgets, see the effect of the function with different parameters applied on different images, directly inside the `imviewer` object.
#### **Signal Viewer** (`sigviewer`)
Optimized for 1-dimensional signal visualization and manipulation. See the dedicated [tutorial](https://github.com/Biomedical-Imaging-Group/interactive-kit/tree/master/tutorials/SignalViewer_Tutorial.ipynb) and [wiki](https://github.com/Biomedical-Imaging-Group/interactive-kit/wiki/Signal-Viewer).
<!-- ### **Decision Boundary Viewer** (`boundviewer`) -->
## Installation and usage
First, make sure you have installed Python 3.6 or higher. Then, `interactive-kit` can easily be installed through PyPI:
```
pip install interactive-kit==0.1rc3
```
To use in a jupyter notebook, you can import the modules in the following way:
```python
from interactive_kit import imviewer, sigviewer
```
## Team
The viewer was developed at the [EPFL's Biomedical Imaging Group](https://bigwww.epfl.ch/), mainly by
* Alejandro Noguerón Aramburu (alejandro.nogueronaramburu@epfl.ch, [Alejandro-1996](https://github.com/Alejandro-1996))
with contributions from
* Kay Lächler (kay.lachler@epfl.ch, [TheUser0571](https://github.com/TheUser0571))
* [Pol del Aguila Pla](https://poldap.github.io), (pol.delaguilapla@epfl.ch, [poldap](https://github.com/poldap))
* [Daniel Sage ](http://bigwww.epfl.ch/sage/index.html), (daniel.sage@epfl.ch, [dasv74](https://github.com/dasv74))
The development of the viewer was supported by the [Digital Resources for Instruction and Learning (DRIL) Fund](https://www.epfl.ch/education/educational-initiatives/cede/digitaltools/dril/) at EPFL, which supported the projects _IPLAB – Image Processing Laboratories on Noto_ and _FeedbackNow – Automatic grading and formative feedback for image processing laboratories_ by Pol del Aguila Pla and Daniel Sage in the sprint and fall semesters of 2020, respectively. See the video below for more information.
[](http://www.youtube.com/watch?v=AF18wN37B6Q "Image Processing Labs with Jupyter")
### Members of the EPFL community
If you want to start using `interactive-kit` rightaway, without going through the process of installing Python and Jupyter, you can [click here](https://noto.epfl.ch/hub/user-redirect/git-pull?repo=https%3A%2F%2Fgithub.com%2FBiomedical-Imaging-Group%2FIPLabImageViewer&urlpath=tree%2FIPLabImageViewer%2FIPLabViewer_Tutorial.ipynb&branch=master) and start using right away from [Noto](https://www.epfl.ch/education/educational-initiatives/cede/digitaltools/noto/), EPFL's Jupyter centralized platform.
## Contributions
We appreciate contributions, feedback and bug reports from the community:
* If you encounter any bug, please open an issue and describe. We will try to fix it or give you a workaround as soon as possible.
* If you wish to contribute, fork the repository and then open a pull request.
%package help
Summary: Development documents and examples for interactive-kit
Provides: python3-interactive-kit-doc
%description help
# `interactive-kit`
A toolkit for interactive visualization of signal and image processing on [Jupyter](https://jupyter.org/) Notebooks.

`interactive-kit` was created to simplify visualization in image and signal processing teaching, learning and research. Using [Jupyter](https://jupyter.org/) Notebooks in combination with `interactive-kit` a user with virtually no programming experience, or without any experience with `matplotlib`, will be able to display and manipulate one or several signals or images and interactively explore them. It is even possible to extract information and perform operations directly on the signal or image without the need to re-run the cell or to plot again.
The class is designed to run in Jupyter Notebooks or Jupyter Lab, using `matplotlib`'s dynamic widget-based environment ([`ipympl`](https://github.com/matplotlib/ipympl)), which needs to be activated with the magic command `%matplotlib widget`. All the functionalities are controlled either through `matplotlib`'s native widgets (zoom, pan, and change of figure size) or through additional `ipywidgets`-based buttons and sliders.
## Modules
#### **Image Viewer** (`imviewer`)
Optimized for image visualization and manipulation. See the dedicated [tutorial](https://github.com/Biomedical-Imaging-Group/interactive-kit/tree/master/tutorials/ImageViewer_Tutorial.ipynb) and [wiki](https://github.com/Biomedical-Imaging-Group/interactive-kit/wiki/Image-Viewer).
##### Main features
Once called, from the `imviewer` and using both widgets and programmatic commands, a user will be able to:
* Plot several images at the same time, and choose different display options (one image at a time, or a customized grid of images),
* Change the brightness and contrast of the images through a slider,
* Explore the histogram of the image,
* Choose different colormaps and visualization options (colorbar, axis),
* Get 1st and 2nd order statistics -updated automatically when zooming into a region- of the image,
* Calculate and visualize differences between two different images,
* Declare functions that perform operations on an image, and through custom widgets, see the effect of the function with different parameters applied on different images, directly inside the `imviewer` object.
#### **Signal Viewer** (`sigviewer`)
Optimized for 1-dimensional signal visualization and manipulation. See the dedicated [tutorial](https://github.com/Biomedical-Imaging-Group/interactive-kit/tree/master/tutorials/SignalViewer_Tutorial.ipynb) and [wiki](https://github.com/Biomedical-Imaging-Group/interactive-kit/wiki/Signal-Viewer).
<!-- ### **Decision Boundary Viewer** (`boundviewer`) -->
## Installation and usage
First, make sure you have installed Python 3.6 or higher. Then, `interactive-kit` can easily be installed through PyPI:
```
pip install interactive-kit==0.1rc3
```
To use in a jupyter notebook, you can import the modules in the following way:
```python
from interactive_kit import imviewer, sigviewer
```
## Team
The viewer was developed at the [EPFL's Biomedical Imaging Group](https://bigwww.epfl.ch/), mainly by
* Alejandro Noguerón Aramburu (alejandro.nogueronaramburu@epfl.ch, [Alejandro-1996](https://github.com/Alejandro-1996))
with contributions from
* Kay Lächler (kay.lachler@epfl.ch, [TheUser0571](https://github.com/TheUser0571))
* [Pol del Aguila Pla](https://poldap.github.io), (pol.delaguilapla@epfl.ch, [poldap](https://github.com/poldap))
* [Daniel Sage ](http://bigwww.epfl.ch/sage/index.html), (daniel.sage@epfl.ch, [dasv74](https://github.com/dasv74))
The development of the viewer was supported by the [Digital Resources for Instruction and Learning (DRIL) Fund](https://www.epfl.ch/education/educational-initiatives/cede/digitaltools/dril/) at EPFL, which supported the projects _IPLAB – Image Processing Laboratories on Noto_ and _FeedbackNow – Automatic grading and formative feedback for image processing laboratories_ by Pol del Aguila Pla and Daniel Sage in the sprint and fall semesters of 2020, respectively. See the video below for more information.
[](http://www.youtube.com/watch?v=AF18wN37B6Q "Image Processing Labs with Jupyter")
### Members of the EPFL community
If you want to start using `interactive-kit` rightaway, without going through the process of installing Python and Jupyter, you can [click here](https://noto.epfl.ch/hub/user-redirect/git-pull?repo=https%3A%2F%2Fgithub.com%2FBiomedical-Imaging-Group%2FIPLabImageViewer&urlpath=tree%2FIPLabImageViewer%2FIPLabViewer_Tutorial.ipynb&branch=master) and start using right away from [Noto](https://www.epfl.ch/education/educational-initiatives/cede/digitaltools/noto/), EPFL's Jupyter centralized platform.
## Contributions
We appreciate contributions, feedback and bug reports from the community:
* If you encounter any bug, please open an issue and describe. We will try to fix it or give you a workaround as soon as possible.
* If you wish to contribute, fork the repository and then open a pull request.
%prep
%autosetup -n interactive-kit-0.1.6
%build
%py3_build
%install
%py3_install
install -d -m755 %{buildroot}/%{_pkgdocdir}
if [ -d doc ]; then cp -arf doc %{buildroot}/%{_pkgdocdir}; fi
if [ -d docs ]; then cp -arf docs %{buildroot}/%{_pkgdocdir}; fi
if [ -d example ]; then cp -arf example %{buildroot}/%{_pkgdocdir}; fi
if [ -d examples ]; then cp -arf examples %{buildroot}/%{_pkgdocdir}; fi
pushd %{buildroot}
if [ -d usr/lib ]; then
find usr/lib -type f -printf "\"/%h/%f\"\n" >> filelist.lst
fi
if [ -d usr/lib64 ]; then
find usr/lib64 -type f -printf "\"/%h/%f\"\n" >> filelist.lst
fi
if [ -d usr/bin ]; then
find usr/bin -type f -printf "\"/%h/%f\"\n" >> filelist.lst
fi
if [ -d usr/sbin ]; then
find usr/sbin -type f -printf "\"/%h/%f\"\n" >> filelist.lst
fi
touch doclist.lst
if [ -d usr/share/man ]; then
find usr/share/man -type f -printf "\"/%h/%f.gz\"\n" >> doclist.lst
fi
popd
mv %{buildroot}/filelist.lst .
mv %{buildroot}/doclist.lst .
%files -n python3-interactive-kit -f filelist.lst
%dir %{python3_sitelib}/*
%files help -f doclist.lst
%{_docdir}/*
%changelog
* Tue Jun 20 2023 Python_Bot <Python_Bot@openeuler.org> - 0.1.6-1
- Package Spec generated
|
